
How it works
Teach invention projects with a clear classroom pathway.
Students code behaviours, connect reusable electronic bits, build with cardboard and follow ready-to-use lessons. You get a clear classroom process from first idea to working invention.
Invention Engine brings the coding app, Hub, bits, construction tools and teaching resources into one system.
The simple idea
Students do not build one model and stop.
They build an invention, attach reusable bits, code how it behaves, test what happens and improve one change at a time. When the project is done, the bits come off and the next invention begins.

Cardboard makes the idea physical, fast and easy to change.
Lights, buttons, sensors, sounds and movement respond to student code.
Students test what happens, debug the code and change one thing at a time.
The classroom process
A clear path from first idea to working invention.
Students build the structure, code the behaviour, add the bits, then test and improve what happens.
Build
Students create the cardboard structure.
Code
Students use block-based coding to control what happens.
Add bits
Students attach lights, buttons, sensors or motors.
Improve
Students test, debug and make changes.
With teacher guides, student guides and the Invention Journal, the classroom has a clear rhythm: set the challenge, explore ideas, plan the build, code the behaviour, test what happens, make improvements and share the result.
The invention cycle
Students follow an invention cycle.
The cycle gives students a repeatable way to move from problem to invention. They define the need, design an idea, plan the build, code, make, test, iterate, communicate and reflect.

How coding works
Students code real behaviours.
Students use blocks to set up the bits, build the program, download it to the Hub, then test what happens in the physical invention.

Set up the bits
Students tell the Hub which bit is connected to each port before the program runs.
Build the program
Blocks run from top to bottom, so students can see sequence clearly.
Download to the Hub
The Hub stores the program and controls the connected bits.
Test and debug
Students check the bug box, change one thing and try again.
How the electronics work
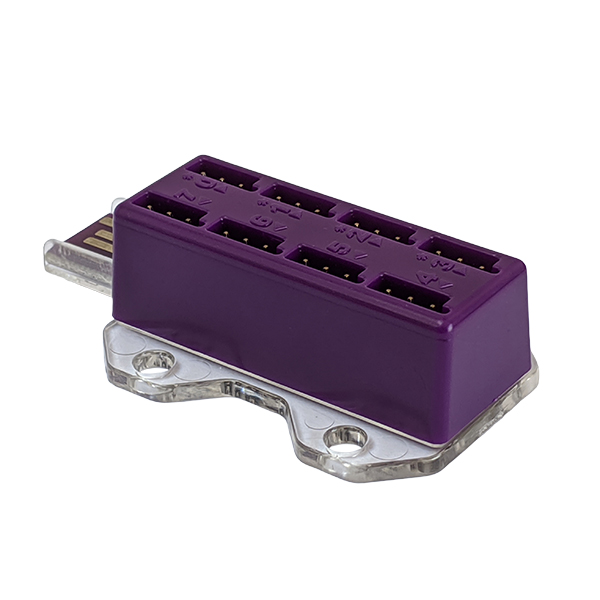
The Hub controls the bits.
The Hub is the brain of the invention. Bits plug into the Hub, the program tells the Hub what to do, and the connected bits make the invention react.
Input bits sense
Buttons and sensors let the invention detect actions, distance, light, sound or movement.
Output bits respond
Lights, speakers, displays, motors and servos make the invention do something visible.
The Hub stores code
Students download the program to the Hub, then the Hub runs the latest saved program.
The battery adds freedom
The invention can run away from the computer when students are ready to test it.
How the building works
Students build with cardboard.
The construction tools help students attach the bits to cardboard, test the shape of their invention and improve the build without expensive materials.
Choose cardboard
Students start with a fast, low-cost material they can cut, fold, decorate and rebuild.
Mark the bits
The tools help students place electronics neatly where the invention needs them.
Secure the bits
Rivets hold the bits in place while students test the invention.
Reuse the system
Bits come off when the project is finished, ready for the next invention.

What teachers do
Guide the process. Grow the confidence. Let students own the invention.
Invention Engine helps you guide the classroom process while students build the confidence to solve, test, debug and improve their own inventions.

Set the challenge
Start with a guided activity, project theme or classroom problem.
Guide the process
Use the teacher guide, student guide and journal to keep students moving.
Support testing
Help students check their code, bits, build and user experience.
Celebrate improvement
Encourage students to share what changed, what worked and what they learned.
Resources included
Resources that keep the class moving.
Teacher guides, student guides, the Invention Journal, the coding app and setup support give you the structure to guide the process with confidence.
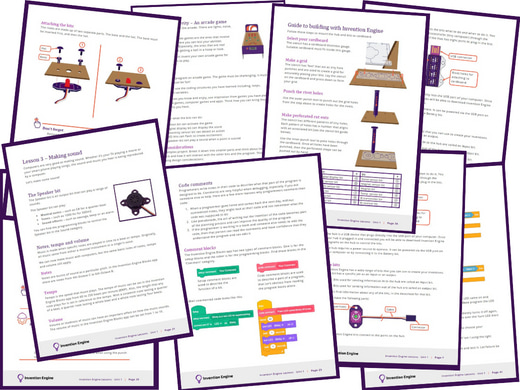
Teacher guides
Delivery notes, prompts, tips and classroom support.
View guides →Student guides
Step-by-step activities students can follow as they code, build and invent.
View guides →Invention Journal
Planning, coding, testing, iteration, communication and reflection.
Download journal →Getting Started guide
Setup help for the Hub, bits, coding app and cardboard build process.
Download guide →Bit datasheets
Quick references for what each bit does and how students can use it.
Meet the bits →Free coding app
The browser-based app students use to program the Hub.
Open app →Troubleshooting support
Practical help for setup, port checks, power checks and classroom questions.
Visit support →Grant writing guide
Support copy for funding requests, learning outcomes and school approvals.
Use the guide →
Next step
Choose your classroom pathway.
Start with the classroom process. Then choose the pathway that gives your students the right starting point.